Kitchen lighting has come a long way from a single overhead bulb. Electricity transformed the space in the early twentieth century; fluorescent fixtures defined the post-war era; and the shift toward open-plan living pushed lighting to become part of the home's overall design language rather than an afterthought. Today, layered lighting integrated into the kitchen's design is the standard — and the options available to homeowners are more capable and more affordable than ever.
- Modern Kitchen Lighting Technologies
- How to Choose Kitchen Lighting
- Practical Upgrades
- Common Mistakes to Avoid
Modern Kitchen Lighting Technologies
The most significant development in kitchen lighting over the past two decades is the widespread adoption of LED technology. LEDs consume a fraction of the energy that incandescent bulbs require, last significantly longer, and are now available in virtually every form factor — strips, pucks, recessed cans, and pendant housings. They work equally well for ceiling fixtures, under-cabinet runs, and interior cabinet lighting.
Smart lighting systems have added another layer of control. Bulbs and fixtures that connect to home automation platforms let you adjust brightness, color temperature, and ambiance from a phone or with a voice command. This is particularly useful in kitchens that transition between high-output cooking environments and lower-light dining or entertaining settings. Motion sensors and programmable dimmers extend that flexibility further, reducing energy use when the kitchen is empty and making it easier to shift the mood without hunting for a switch.
According to the U.S. Department of Energy, switching to LED lighting across the home can cut lighting energy use by up to 75 percent — a meaningful number in a kitchen where lights often run for hours each day.
How to Choose Kitchen Lighting
| Layer | Purpose | Typical fixtures | Color temp |
|---|---|---|---|
| Task | Illuminate work surfaces directly | Under-cabinet strips/pucks, recessed downlights above sink and range | 3,500K–4,000K |
| Ambient | General room fill, prevent harsh contrast | Recessed ceiling cans, island pendants with diffusers | 2,700K–3,000K |
| Accent | Visual depth and interest | Cabinet interior lights, toe-kick strips, open-shelf lighting | 2,700K–3,000K |
Placement
The kitchen has three distinct zones that each require their own lighting approach: task areas, ambient fill, and accent or feature points.
Task lighting covers the surfaces where work happens — countertops, the sink, the range, and inside deep cabinets. Under-cabinet fixtures are the most effective solution for countertops because they put light directly on the work surface without casting shadows from overhead. Recessed downlights work well for range and sink areas when positioned directly above rather than behind the worker.
Ambient lighting fills the rest of the room and prevents the harsh contrast between bright task zones and dim surroundings. A combination of recessed ceiling fixtures and pendant lights over an island or peninsula handles this in most kitchens. In smaller kitchens, a single well-placed overhead fixture with a diffuser can do the same job at lower cost.
Accent lighting — inside glass cabinets, along toe kicks, or above open shelving — adds depth and visual interest without contributing much to functional illumination. It is worth including in finished spaces but should not come at the expense of the task and ambient layers.
Color Temperature
The color of light has a direct effect on both the usability and the feel of the kitchen. Color temperature is measured in Kelvin: lower numbers produce warmer, more amber light; higher numbers produce cooler, bluer light.
For task areas — countertops, the sink, inside the refrigerator zone — a cooler temperature in the 3500K to 4000K range provides crisp, accurate light that makes food prep easier and colors easier to read. For ambient lighting and dining areas, warmer temperatures in the 2700K to 3000K range create a more relaxed atmosphere that works better for eating and entertaining.
The most flexible approach is to use fixtures that support tunable white LEDs, which allow the color temperature to be adjusted by time of day or activity. Failing that, using warmer bulbs in pendant fixtures and cooler temperatures in task-focused recessed cans achieves a reasonable balance without requiring smart controls.
Fixtures
Fixture style should follow the kitchen's design language, not lead it. Modern kitchens with flat-front cabinetry and minimal hardware read well with simple, geometric pendant forms and flush or semi-flush ceiling fixtures. Transitional and traditional kitchens can support more decorative elements — lantern shapes, exposed Edison bulbs, fixtures with warmth in their finish — without feeling out of place.
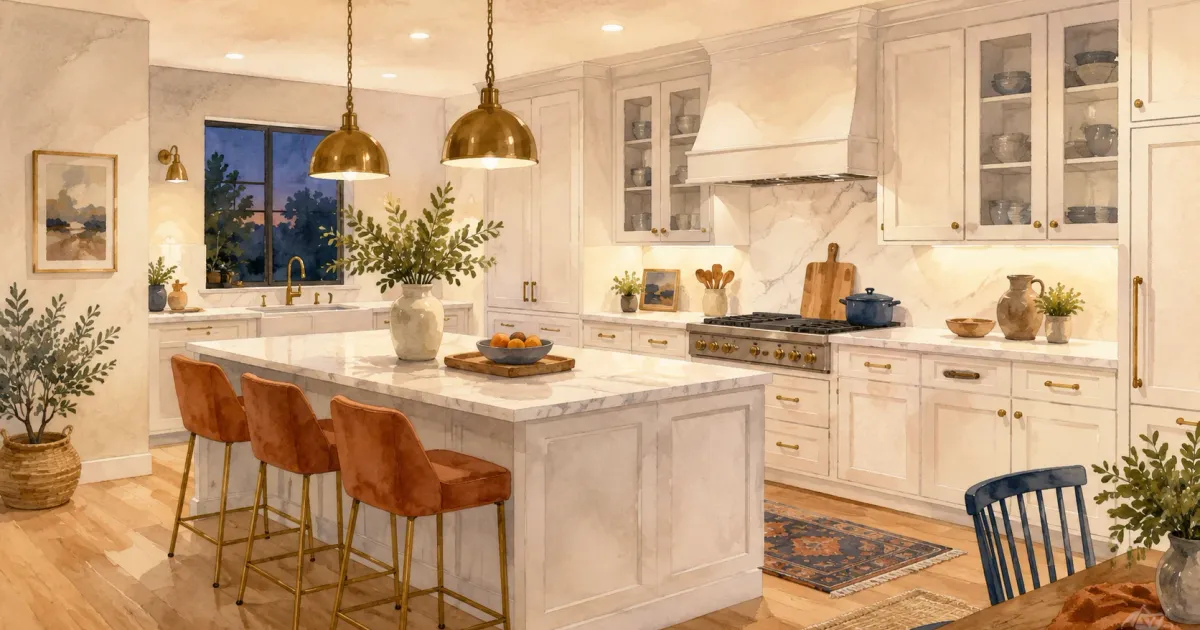
Scale matters as much as style. A pendant hung over an island should be proportionate to the island's length: one larger fixture or a row of smaller ones spaced evenly. A single small pendant over a large island looks undersized; an oversized drum fixture in a compact kitchen can feel oppressive. As a rule, pendant bottoms should hang 30 to 36 inches above the countertop surface.
For over-sink fixtures, look for options rated for damp locations and positioned to light the basin directly rather than from behind. Recessed cans directly above the sink work well; a small pendant is a design upgrade that serves the same purpose.
Brightness and Dimmers
Dimmer switches are one of the highest-value upgrades in a kitchen lighting plan. They extend the range of any fixture from full output for task work down to a low ambient level for evening use — without requiring separate fixtures. Most modern LED fixtures and bulbs are dimmable, but it is worth confirming compatibility before purchase, as not all LED drivers behave well on older dimmer hardware.
For overall brightness, the goal is enough output for safe food preparation without creating a space that feels clinical when you are not cooking. A layered plan — separate circuits for task, ambient, and accent — gives you independent control over each zone and is the most effective way to achieve that balance.
Practical Upgrades for Kitchen Lighting
Not every kitchen lighting improvement requires a full renovation. Several upgrades can significantly change the quality and character of the light without touching the ceiling or rewiring the space.
Replacing builder-grade recessed fixtures with LED retrofit kits is one of the easiest. The conversion takes minutes per fixture, improves output and efficiency, and often changes the color temperature to something more appropriate for the kitchen. Under-cabinet lighting — LED strip or puck systems with plug-in options — can be added without an electrician and immediately improves countertop task lighting.
Adding or upgrading dimmer switches is another straightforward improvement. If your current switches are not dimmable, swapping them out is a minor electrical project that has an outsized effect on how the kitchen functions in the evening.
For kitchens undergoing a larger remodeling project, the lighting plan should be coordinated with the cabinetry, island, and electrical layout before work begins. Retrofitting lighting after cabinets are installed is always harder and more expensive than planning for it from the start. That includes specifying the number and placement of recessed cans, roughing in pendant drops over the island, and ensuring under-cabinet wiring is in place before the uppers go up.
For more on sustainable approaches to kitchen upgrades, see our notes on eco-friendly kitchen remodel ideas.
Common Kitchen Lighting Mistakes
The most common mistake is treating kitchen lighting as a single-layer problem — one overhead fixture to cover everything. This leaves task zones shadowed, makes the room feel flat, and limits your ability to change the atmosphere without a full redesign. Layering ambient, task, and accent sources from the start is always the better approach.
The second mistake is ignoring dimmers until after installation. Adding dimmer compatibility later often means replacing switches, and sometimes fixtures, that were not specified with dimming in mind. It is far easier to include dimmers in the original plan.
The third is choosing fixtures primarily for their appearance without accounting for the light they actually produce — output, color temperature, and beam spread. A fixture that looks right in a showroom can perform poorly in the kitchen if it throws light at the wrong angle, runs too warm, or does not put enough output on the work surface. Spec the light quality first, then find fixtures that deliver it in a style you like.
Frequently Asked Questions
How many recessed lights do I need in a kitchen?
A common rule of thumb is one recessed fixture for every 4 to 6 square feet of ceiling area, but placement matters more than count. The goal is even coverage without hot spots or shadows — which means positioning cans 2 feet from walls and spacing them 4 feet apart on center as a starting point, then adjusting for task zones above the sink, range, and island. Kitchens with higher ceilings (9 feet or more) need higher-output fixtures or closer spacing to maintain adequate illumination at the work surface.
What is the best color temperature for kitchen lighting?
Use two temperatures: 3,500K to 4,000K for task areas (countertops, sink, range) where crisp, accurate light matters, and 2,700K to 3,000K for ambient and accent layers where a warmer tone creates a more comfortable atmosphere. Tunable white LED fixtures let you adjust between those ranges by time of day — the most flexible option if your budget allows.
How high should pendant lights hang over a kitchen island?
Pendant bottoms should hang 30 to 36 inches above the countertop surface. For standard 9-foot ceilings, that puts the pendants at a comfortable 5 to 5.5 feet from the floor — visible but not obstructive. If your ceilings are higher, adjust upward while maintaining the 30–36 inch clearance above the counter. For a row of pendants over a long island, space them evenly and leave at least 6 inches of clearance between pendant edges.
Can I add under-cabinet lighting without rewiring?
Yes, in most cases. Plug-in LED strip and puck systems require only an outlet inside or near the cabinet — no electrician needed. They are a practical upgrade that immediately improves countertop task lighting. Hardwired systems look cleaner (no visible cord) and are the better long-term solution during a remodel when walls are open, but the plug-in option is a meaningful improvement that any homeowner can install in an afternoon.
Ready to Redesign Your Kitchen Lighting?
A well-planned lighting scheme is one of the most noticeable improvements you can make in a kitchen — and one of the most underplanned parts of most remodels. Getting it right means coordinating fixture placement, electrical, and cabinetry before the walls close up.
Contact Honey-Doers to talk through your kitchen lighting plan. We work with Twin Cities homeowners in Minneapolis, Edina, Eden Prairie, and the surrounding suburbs.